Create a Custom Profile
Posted: Mon Apr 28, 2014 12:17 pm
**For VSO Video Converter, BLu-ray and DVD converter programs only**
Did you know that you can create custom profiles so you can set your exact parameters to your projects?
The profile can be named, saved and added to the list of outputs, so that you can use it directly next time you need to achieve the same results!
Setting a custom profile is super easy:
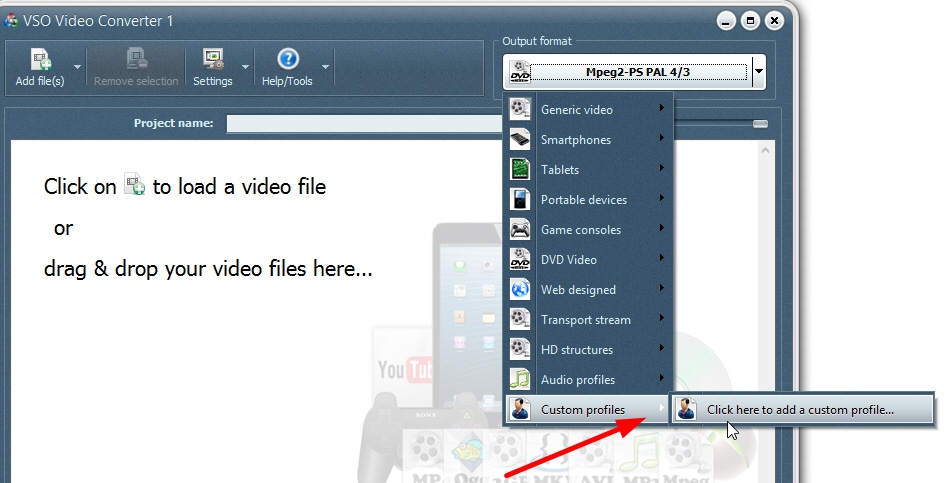
1. Select “custom profile” at the bottom of the output list, then click on “click here to add a custom profile”
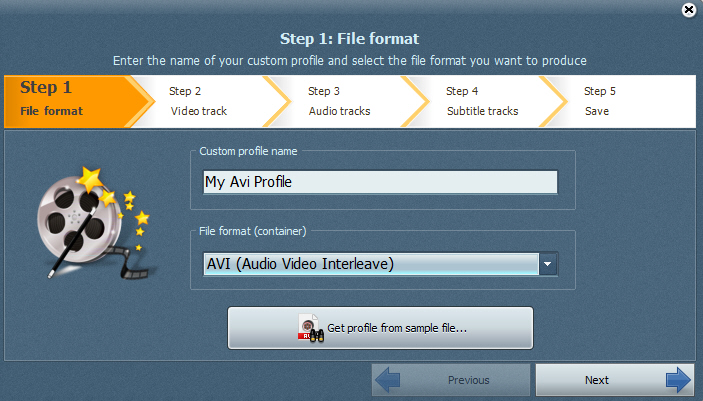
2. Start by giving your project a name if you think you’ll be using the same settings again, then pick the output format in the drop down list.
Notice the “get profile from sample file” option at the top. This will “take” all encoding settings from a file and fill the profile with the audio/video/subtitle stream properties, if possible
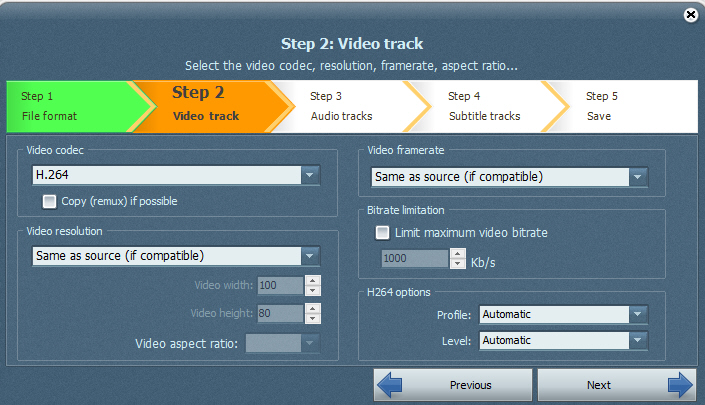
3. In the next window you can edit the Video settings: enter the desired video codec , resolution, framerate. Depending on the video format chosen, some options will be available or not, due to the format restrictions, if there are any.
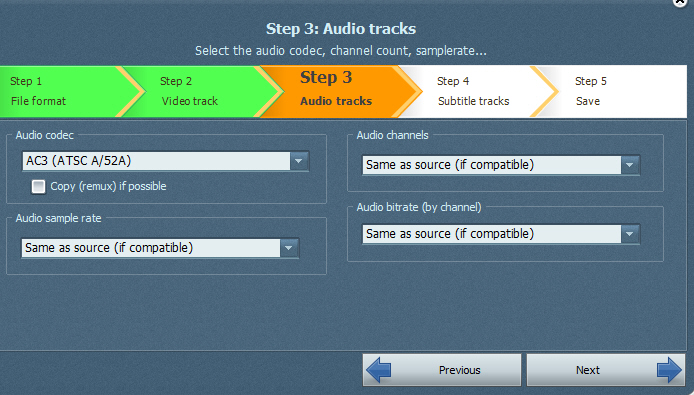
4. Let’s move to the audio settings. Codec, channels, bitrate and sample rate can be edited. Of course if you have no idea what to select we suggest leaving the settings as is.
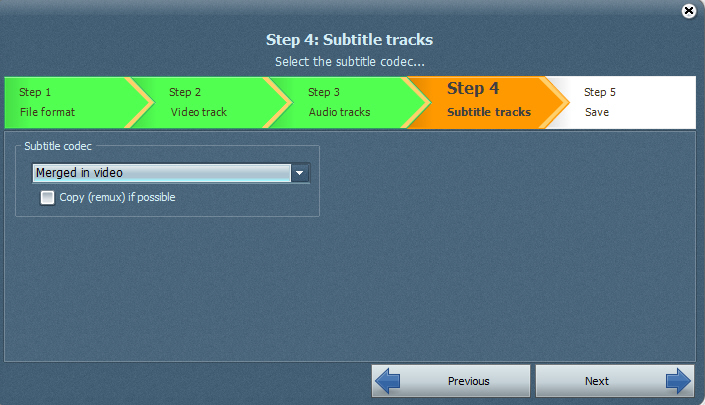
5. Now on to the subtitles. This setting is particularly important if you make a DVD with external subs and want to merge them into the video, which we recommend for best display results. Also this saves you having to activate the subtitles when watching the DVD on the player. So for “embedded subtitles” , make sure you select the “merged in video” setting.
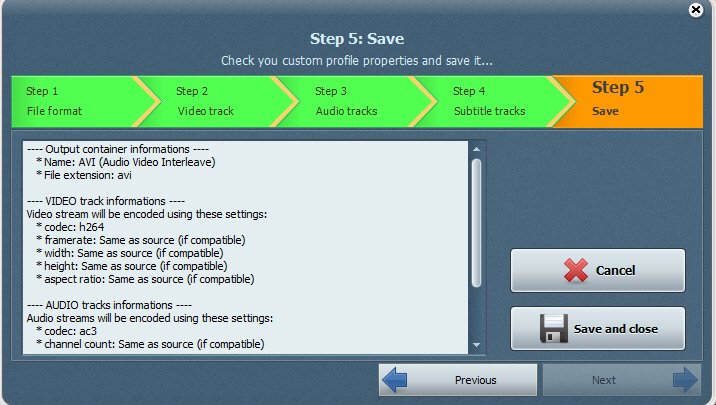
6. Validate all your settings, and save and close when you’re happy with it.
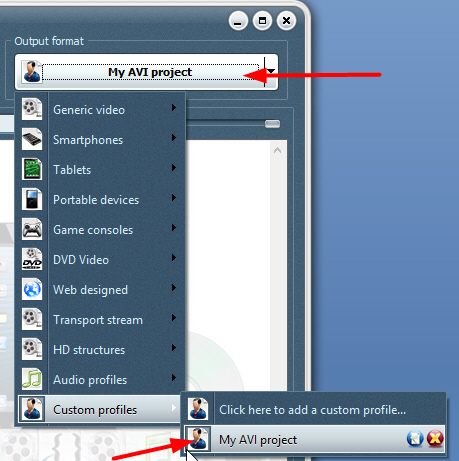
7. Your created profile is now added to the list. You can re-use it without having to set all your parameters again, edit it or remove it if it won’t be needed later
Did you know that you can create custom profiles so you can set your exact parameters to your projects?
The profile can be named, saved and added to the list of outputs, so that you can use it directly next time you need to achieve the same results!
Setting a custom profile is super easy:
1. Select “custom profile” at the bottom of the output list, then click on “click here to add a custom profile”

2. Start by giving your project a name if you think you’ll be using the same settings again, then pick the output format in the drop down list.
Notice the “get profile from sample file” option at the top. This will “take” all encoding settings from a file and fill the profile with the audio/video/subtitle stream properties, if possible

3. In the next window you can edit the Video settings: enter the desired video codec , resolution, framerate. Depending on the video format chosen, some options will be available or not, due to the format restrictions, if there are any.

4. Let’s move to the audio settings. Codec, channels, bitrate and sample rate can be edited. Of course if you have no idea what to select we suggest leaving the settings as is.

5. Now on to the subtitles. This setting is particularly important if you make a DVD with external subs and want to merge them into the video, which we recommend for best display results. Also this saves you having to activate the subtitles when watching the DVD on the player. So for “embedded subtitles” , make sure you select the “merged in video” setting.

6. Validate all your settings, and save and close when you’re happy with it.

7. Your created profile is now added to the list. You can re-use it without having to set all your parameters again, edit it or remove it if it won’t be needed later
