As JJ said, modifying files is (probably) not supported by VSO, if something happens it will be your own responsibility, not VSO's or mine. I strongly recommend that you back up every file before you edit it.
This guide will show you how you can further customize your menu, without having to do it over and over every time. For example, when you prefer having your own background(image/movie/audio) every time, this might be a good solution for you.
The + & - of editing the menu like this are:
+Your own background(video/image), standard.
+Your own background audio, standard.
+Your own selection bubbles(clip selection image)
+Your own buttons (play, previous, menu etc)
+Your own 2 images to accompany audio/subs screen
-Length of the menu is fixed (24.800 seconds)
Solution: http://forums.vso-software.fr/guide-how ... t6260.html provided by ckhouston, see this topic to adjust menu length.
-Positions of selection bubbles, text & buttons are fixed.
An example of what your chapter selection menu might look like:
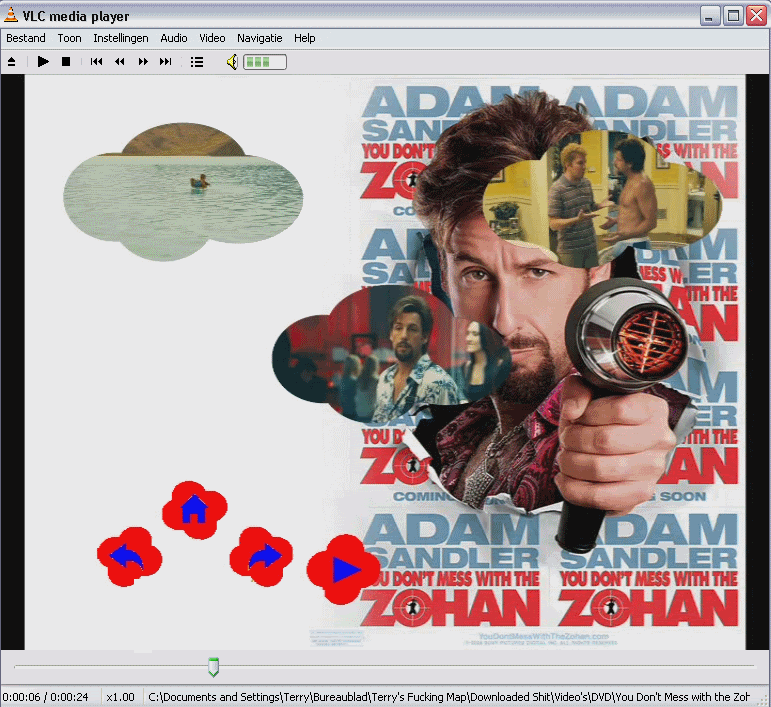
(Note, the quality looks bad, but thats because it has been saved as a smaller filesize.) Which has been edited from here:
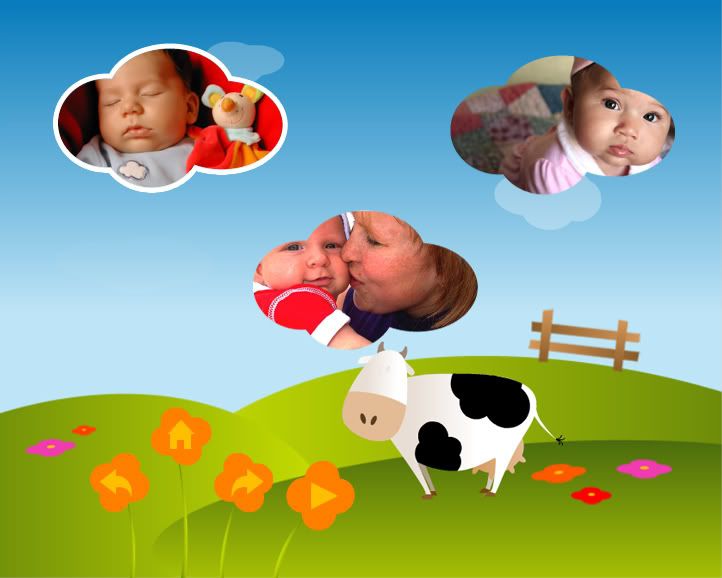
The shapes of everything seen here can be changed, the positions however are fixed.
If you're still intrested, read on, however from here on it will get hard, yet intresting.
You will need the following programs:
-Image Editor (needs to be able to handle PNG, GIF & BMP) - I used Jasc Paint Shop Pro 9
-Audio Editor - I used GoldWave (&Free MP3 WMA Converter)
-Video Editor - I used Windows Movie Maker & Ultra MP4 Video Converter)
-Champetre menu template, availabe for download here: http://forums.vso-software.fr/get-free- ... t5734.html
First you should make a back-up of the map Champetre, located at \ConvertX\templates\Champetre. Now well take a look at whats in the map. The champetre_3ch.ini file should not be changed. Its also not necessairy to change; intro, 3chapters, configuration.
Better: Create a new template, by copying the existing Champetre, see post #5
The method: all the other files can be changed according to your liking. I recommend opening these files into an image editor, and than editing them, and creating a new image and replacing it with the old one. This is because the image with and height should be unchanged, they can be changed however, but the script will change them back to these resolutions. Example:
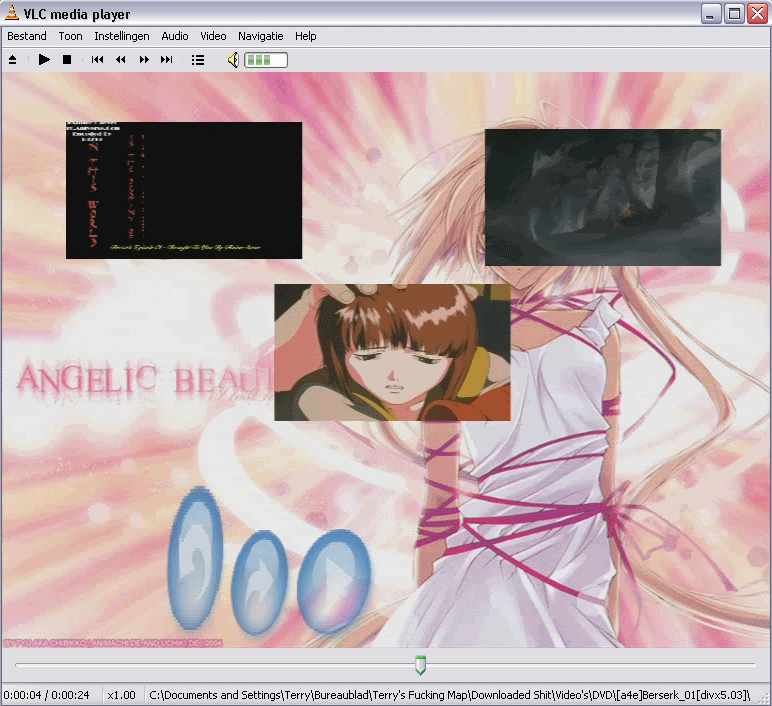
This shows us that with and height are fixed and cannot be changed (not with this guide). Its absolutely neccessairy to leave filenames and extensions unchanged. For example btn_menu.gif MUST stay btn_menu.gif. Or it will not work.
As for the video and the audio file, editing it from the existing files would be hard to do. The video, I have only tested it with still images, I have edited this image with Windows Movie Maker to convert it to .AVI, make sure its saved as .avi (divx codec recommended, but untested whether this is really needed) and 720x 576 pixels. All the menu's have a fixed lenght of 24.800 seconds (unless changed), therefore video added (fond.avi) can also be 24.800 seconds or it will loop. A small piece of movie is not fit for this. Audio saved in the fond.avi will not be heard on the menu, simply extracting the audio from clip and saving that as the wav file does not work, its out of synch. This needs more testing, but Im not going to test on this anymore, I have tried a few things but I did not succeed in synching the audio with the video.
The audio sample used should be 24.800 seconds in lenght, this will loop. (I suggest fading in/fading out for a flawless loop) Video must be saved as fond.avi and audio must be saved as vache_boucle20s-48K.wav, when you write the audio file's incorrect, the audio wont show up.
You might also want to use an image instead of an video file (which is true in my case). When using an image file instead of an video file, and you want to increase your menu lenght, than the timestamps (see ckhouston's guid) do not have to be changed (as I can understand changing these timestamps is a bit difficult).
These steps have to be taken to apply your image to your menu.
1. Create an image in an image editor (I recommend saving as .PNG, for example we take Celestial.PNG)
2. Copy Celestial.PNG into your template map
3. Open champetre_3ch.ini with wordpad, NOT WITH NOTEPAD
4. Search (ctrl+f) for the following: fond
5. You will see the following line: value=fond.avi, change this line into value=Celestial.png
6. Save & close. (Note; more than 1 (5) lines must be changed to apply to all menu's, you can also choose different image files for the different menu's.)
Conclusion: you can adjust everything in the map ''Champetre'' and change it according to your liking. But you should note 2 things: Do not change filenames, and do not change with/height.
The .ini file can be tweaked as well, for example menu length or the font.
These steps have to be taken to change the font:
1. Select a fond you want to use as standard (in this example we use comic sans, when copied into my map it shows up as comic.ttf, doublecheck this, otherwise you have to adjust name, note: the extension .ttf may be hidden)
2. Hover to C:/Windows/Fonts
3. Copy (ctrl+c) paste it to the map of your template
4. Open champetre_3ch.ini with wordpad, NOT WITH NOTEPAD
5. Search (ctrl+f) for the following lines; chubby
6. You will find font_file=chubby.ttf first, change every font_file=chubby.ttf into font_file=comic.ttf
7. You will also find Name=Chubby Cheeks, change these lines into Name= Comic Sans MS (note; this line must match the title of the font)
8. Save & close (note; all lines must be replaced)
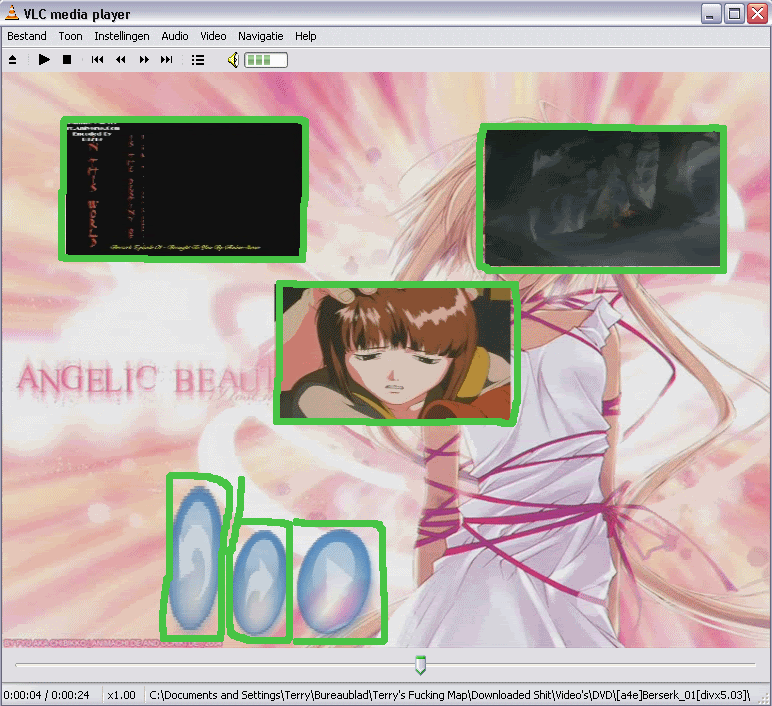
This image shows us what the positions for the buttons are:
What we know so far might seem nice, but there is more about the images. We will go back to our first menu, which is from the movie Zohan;
I have given the buttons a number;
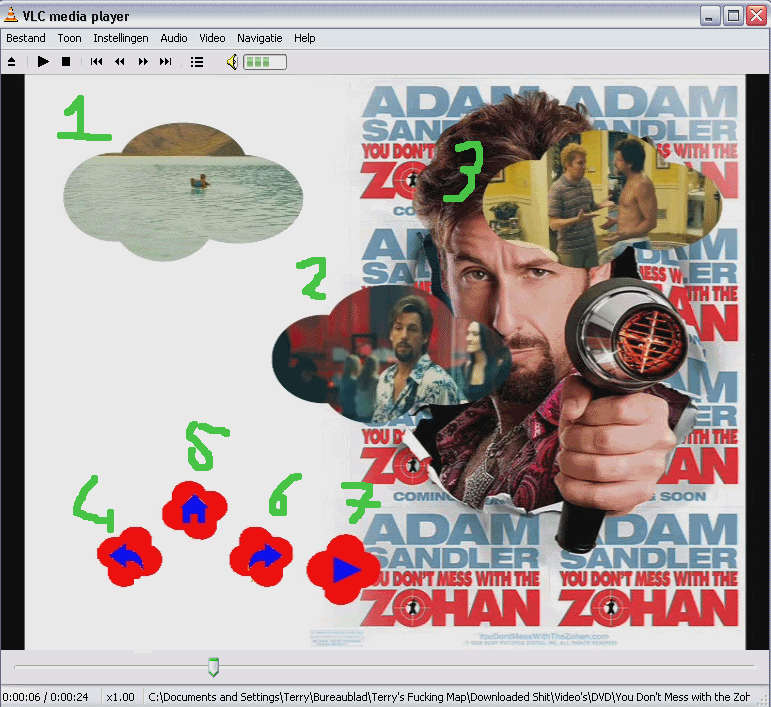
Every button has 3 different views options;
Normal, hovered over, and select.
First we will discuss button 1,2 & 3, which are the same. The corresponding image files are: nuage_alpha.bmp & puce_nuage.bmp.


Aspects of the buttons:
Normal: uncolored (video clip)
Hovered over: A blue line becomes visible around the video clip
Selected: I forgot... (not important)
What does this tell us? In the first image, there should be 2 colors used, black and white. Black has the function: not to show the videoclip, but the background, white has the function: show the videoclip not the background. With this in mind we should create our own nuage_alpha.jpg.
In the second image, this is what makes the blue line appears, there should also be 2 colors used, again, black and white. Black has the function: do not show blue, white has the function: show blue. With this in mind we should make our puce_nuage.gif.
The buttons 5 & 6 (only repainted by me). This section requires further testing.
Normal: red/blue
Hovered over: yellow/blue
Selected: green/blue
(I forgot the actual colors on these last 2, but they did change color)
There might be 2 things with these images (these are no facts but thoughts);
1) The script is hardcoded to make them Yellow/Green in different states.
2) The images is based on contrasts (which I think is more likely) when you use the color RED in your image, when hovered over, it will be another color, chosen from the palette by the script.
The buttons 4 & 7 have similar features.
However, these use an different palette/script.
Normal: red
Hovered over:dark grey (or light gray)
Selected: light gray (or dark gray)
Going through this whole process ones, gives you a more customized menu, in which you dont have to change anything anymore (like audio/images). I wish you happy designing, sharing results would be appreciated very much, adding information/feedback as well, also a lot of things must be tested and some information could possibly be wrong. Please keep this topic clean. Maybe the developers of the templates (champetre) could shed some light on this.
/Zspanky
Credits:
Champetre Script by unknown (VSO Software developers?)
Guide by Zspanky
Contributions by ckhouston